Chapter 12: Upheaval
Story
Upon seizing Fort Eureeka, the Hero of Legend struck a grand blow to the Vedirian armies. Enraged by this attack, Duke Terenor marches his forces to Fort Eureeka in an all-out assault against the Donari Temple army. Backed up by Duke Isanter forces, the Donari Temple army prepared for an great assault.
Map
Objectives
| Mission Info | |
|---|---|
| Main Objective |
Defend Fort Eureeka OR Defeat Casamir's entire army |
| Defeat |
Hero of Legend is defeated in battle OR The enemy captures Fort Eureeka |
| Challenge Missions |
1) Survive against Casmir's army for 2 turns (10 |
| Target Turns | 13 |
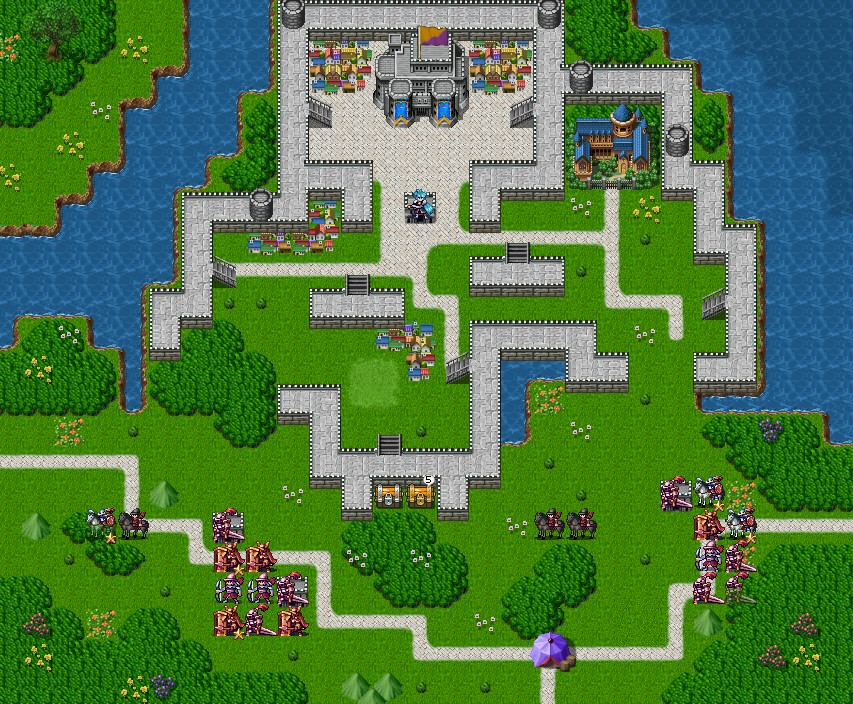
Points of Interest
Allied Structures:
- (13,3) Fort Eureeka (Home Base)
- (19,5) Donari Temple
Capturable Objectives:
- None
Bazaar:
- (17,20) Bazaar
Treasures:
- (12,15) Proof of Merit
- (13,15) Everlasting Potion, Timed Chest: 5 turns
Strategy
This chapter is a strange mission, as some normal rules are not applied. For example, permadeath in this mission disabled, thus all lost units or whole squads themselves, are available even if not revived. The bonuses objectives, also reflect this.
The strategy for the first part should be as followed The strongest attack comes from the west, thus set up a defensive line in the forest between the walls there. On the southern wall, place around 3-4 archery squads. They can either help attacking the western forces and the tougher ones, may also be used to distract the ranged squads of the enemy, or may be used as bait for the infantry-mage squads, who may attack only with their mages. On the eastern part, you need about 3-5 troops to hold of the attack there. Set up your defenses in the wall corridor section.
In case you want extra time, the player should retreat a bit, in order to let Duke Teneror's squad not attack the Donari army. As he is foolishly, literally leading his squad on the front line, he is very likely to die and his death is the trigger for the second part, even if some his squad remains.
In the remaining time, send some troops to the chest and a cavalry squad to the bazaar. Even though some items and troops bought there could possible not be of immediate use, later in the campaign, they will be.
Veridian reinforcements
Here comes the truly tough part of this chapter, and this part requires a large amount of luck with resources and units in the previous chapters. With Legends DLC, this part is significantly less difficult or even quite easy.
Aftermath
Even if the reinforcements led by Casamir have been defeated or not, the conclusion is the same. The Veridian army and the reinforcements of Duke Teneror are able to besiege Fort Eureeka with small or significant costs in lost troops. The Donari army and Isanter's Army evacuate, with the Hero of Legend's squad taking a last stand and losing.
The troops of the hero are available at some later point. The nine chosen squads are the only troops available for chapter 14 and 15 and at chapter 16, access is gained to the marketplace. The troops in reserve will also return at a later point in the story. Some of the unique-characters squads are also not available and they will return at some point as well. In case they had no squad to lead, they will have a new one at that point, but they will be removed from their current squad.
Neither will the player character somehow lose items and Resources (SoW1).

